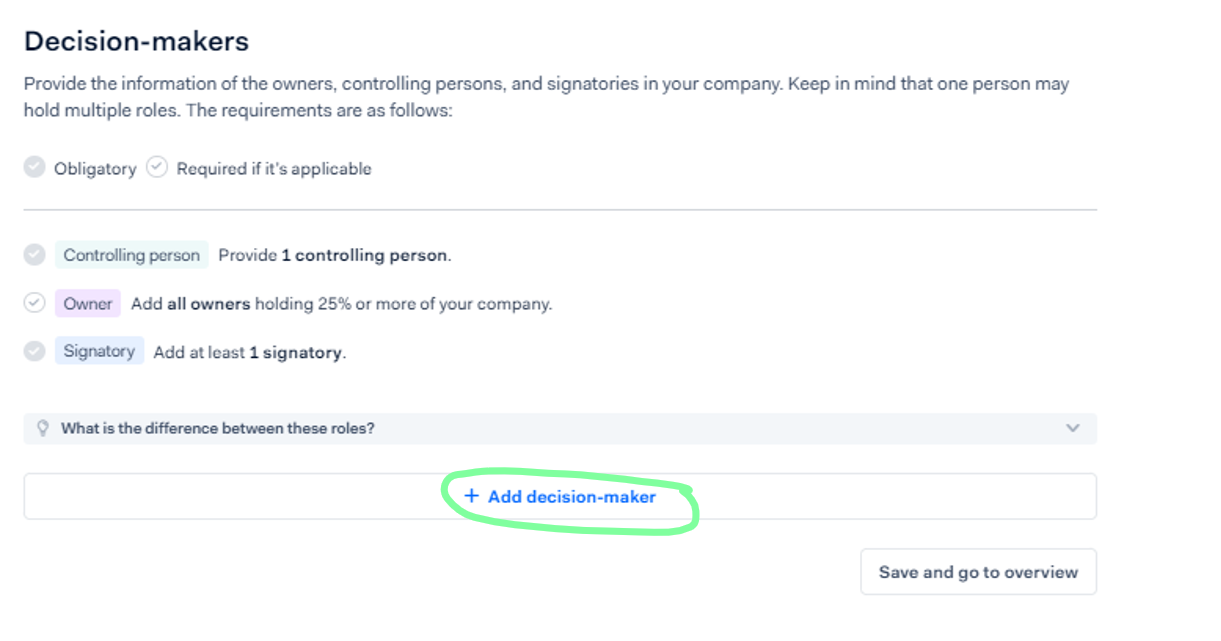
In this section you will need to provide the information of the owners, controlling persons, and signatories in your company. Keep in mind that one person may hold multiple roles.
Step1: Select + Add decision-maker
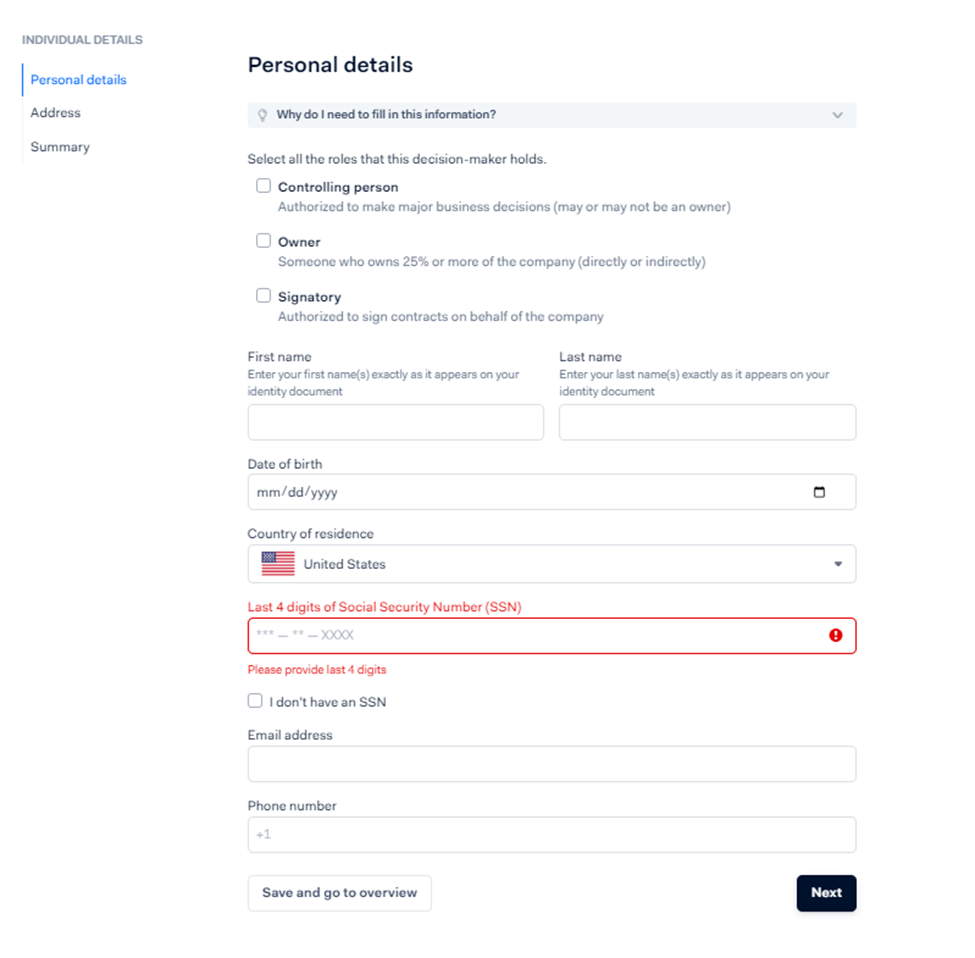
Step 2: This section will be completed for all decision makers on this account.
Select all roles that the decision maker holds.
Enter First and Last name
Enter or use the calendar option to enter the date of birth
Confirm Country of residence
Enter "last 4" of the decision makers social security number. If you do not have a social security number check the box "I don't have an SSN"
Enter the email address for the decision maker
Enter the phone number. Be sure to include the country code when entering the phone number. (ie. +1 for US)
Select Next
Note: If a signatory is included there will be an additional field for Job Title to be included.
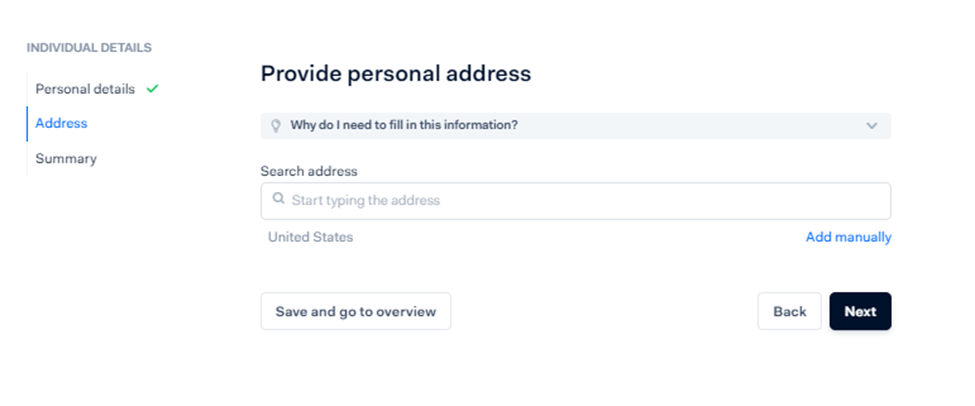
Step 3: Provide personal address. This can be entered manually or by typing in the beginning part of an address and searching.
Step 4: A summary of the information provided will populate and you will need to review and select submit to confirm that the information is complete and accurate.
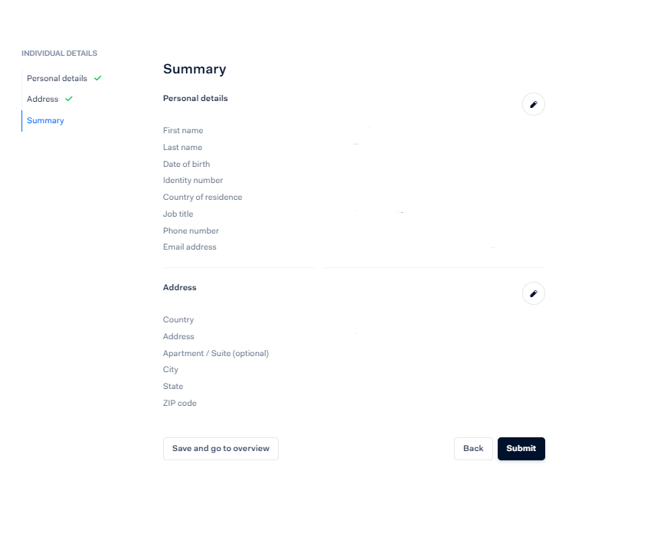
Photo IDs
If the automatic verification for an individual's identification number fails, the applicant may be asked for a photo ID. The name in the photo ID must match the name sent during the onboarding process.
If the names are different—for example, the applicant provided their married name to register but their passport has their maiden name—the photo ID check will fail.
The first and last name provided when creating the legal entity must match the photo ID exactly. If the individual only has one name, they must use this name for both the first and last name fields when creating the legal entity.
The following are the accepted photo ID documents,
You must include both the front and back of the identity card or driver's license.
| PHOTO ID Document Types | |
| Passport | Must be the data page (picture, MRX, and details) |
| Identity Card | Must be a government-issued identity card. Front and back, each side in its own file. |
| Driver's license | Front and Back, each side in its own file. |
The photo ID must:
- Be non-expired.
- Have the machine-readable zone visible (if available).
- Be a physical photo ID document, not digital.
- If there is an available field for a signature in the document, it must be signed.
The uploaded document must:
- Have separate files for front and back of the ID document (only when providing an ID card or driver's license).
- Be a full color and straightened image. The corners and edges of the ID must be fully visible.
- Be a photo or a scan of the physical photo ID document.
We do not accept:
- Digital IDs.
- Secondary copies of IDs. These include screenshots of photos, a photo pasted onto another document, a photo of a screen, or a photo of a printout.
- Low-quality images.
The uploaded document can be a maximum of 15 pages.
The uploaded document must meet the following file format and size requirements:
- Formats: JPEG, JPG, PNG, or PDF (maximum 1 file)
- Size for PDFs: minimum 1 KB, maximum 15 MB
- Size for other formats: minimum 100 KB, maximum 15 MB
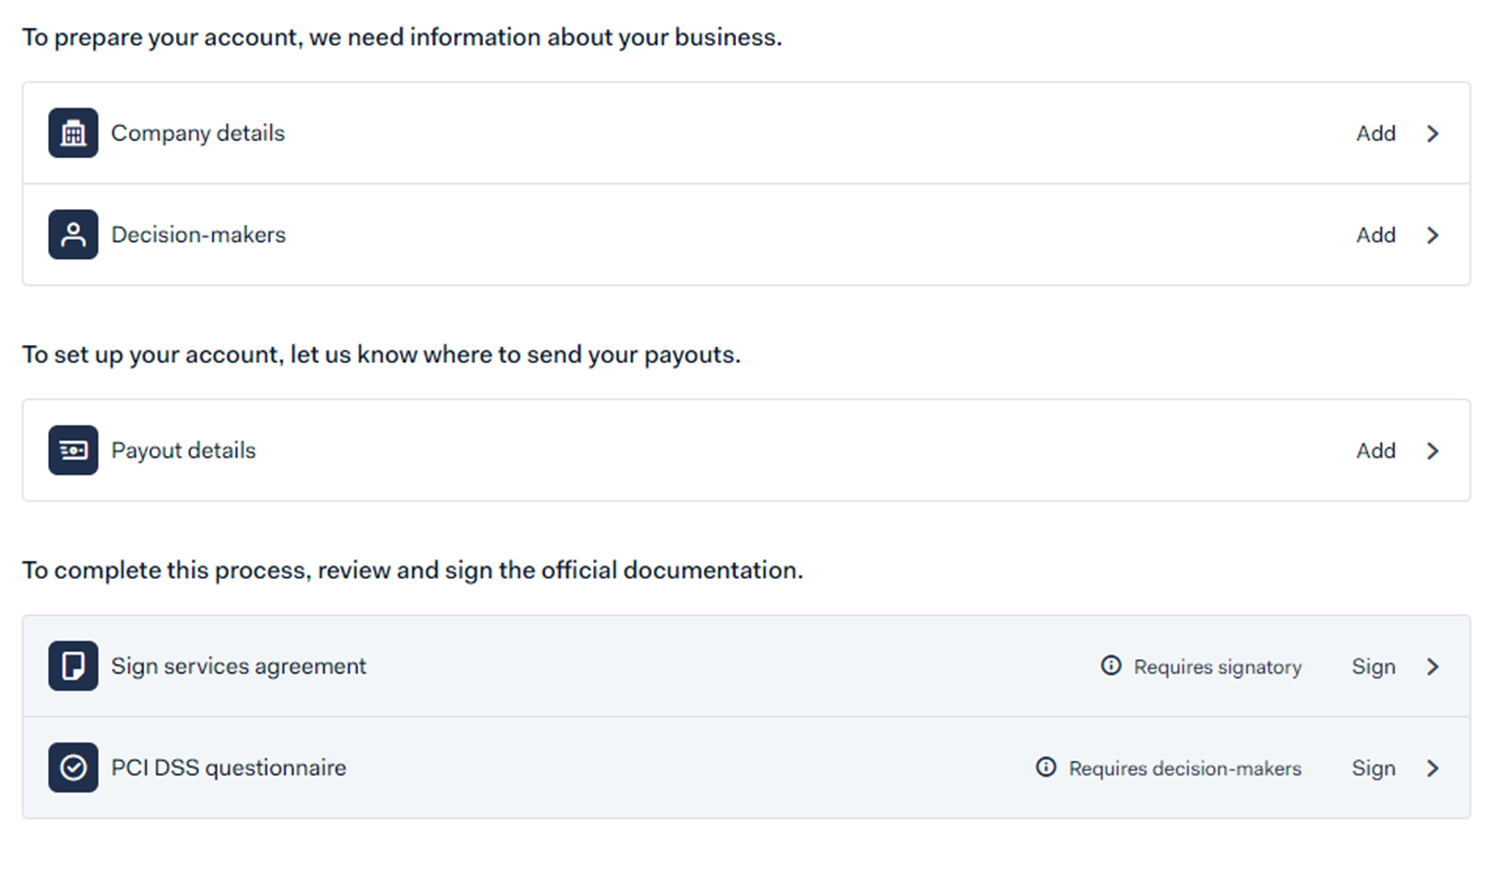
The Home screen of your application will reflect as follows once the Decision-makers section has been completed.

Next Steps: Banking Account Details - Select one option.
Onboarding - Payout Details - Option 1 - Instant - Verify the account via mobile bank app or bank website.
Onboarding - Payout Details - Option 2 - May take a few hours or days - Provide account details and upload a scan of a bank statement.
Was this article helpful?
That’s Great!
Thank you for your feedback
Sorry! We couldn't be helpful
Thank you for your feedback
Feedback sent
We appreciate your effort and will try to fix the article